Recently, I wanted to connect an Action Network form that collects emails to a Google Sheet. The sheet is designed for mobilizers to find users that signed the Action Network form and reach out to them for a high-touch onboarding to the DSA National Tech Committee. Action Network made it pretty easy to get started with webhooks, but n8n can be intimidating for those not familiar with data structures. While I’m no n8n expert, I can show what I did to get the data from Action Network to Google Sheets with minimal fuss.
Get n8n
I run n8n on Cloudron, a one-click way to install dozens of apps and not worry about patching, backups, or any other maintenance tasks. You can also support n8n’s fair code licensed product with an n8n.cloud subscription, and not worry about installation or some service accounts at all.
Authorize n8n
The first step is to set up credentials in n8n so it can talk to Action Network and Google. Action Network has instructions for creating a webhook here (you will need the right permissions) and n8n has instructions for creating a Google credential here (I recommend using a service account).
Create your webhook
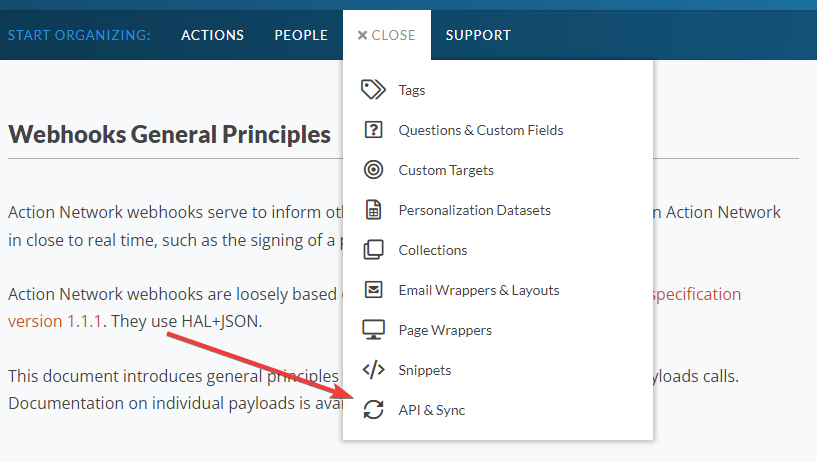
Now over to Action Network. On the top of the screen, next to Start Organizing, click Details, then API & Sync. On the left, you should see the button to create a new webhook.
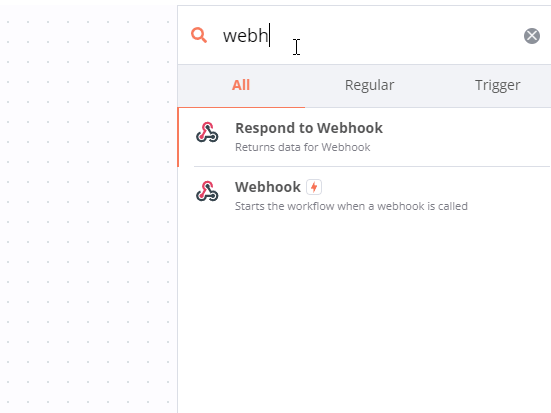
Now, back to n8n. Click the orange + icon to add a new object. Find the Webhook object (with the orange lightning bolt, indicating it will start the workflow) and select it.
Change the request type to POST. Copy the Test URL. Don’t touch anything else.
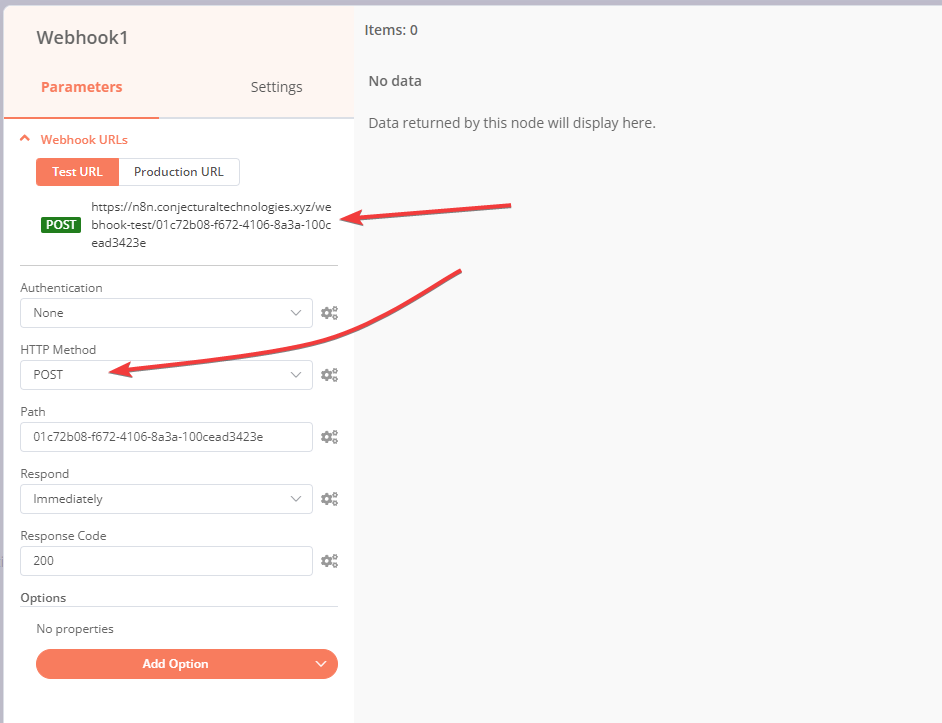
Switch back to your Action Network tab and paste in the Test URL. Don’t hit save yet — back to n8n. Let’s put the rest of our flow in.
Data Wrangling
Action Network, like many other sites, returns data in JSON format. We can’t simply export the JSON directly to Sheets — Sheets expects the data to look like, well, a spreadsheet. To make this data look how Google Sheets needs, we’ll use n8n’s Set block along with expressions. Expressions are a complex but incredibly powerful and critical part of n8n. Expressions allow you to programmatically define the value of a given field. For example, when filling in the Email field in the set block, you don’t want to just write something – we’re trying to automate. We need an expression to say “this field (email) has a value of (JSON location, user.email_addresses[0].address)”.
JSON crash course
Here’s a 90-second crash course in JSON. JSON is a format for defining data. It looks like this:
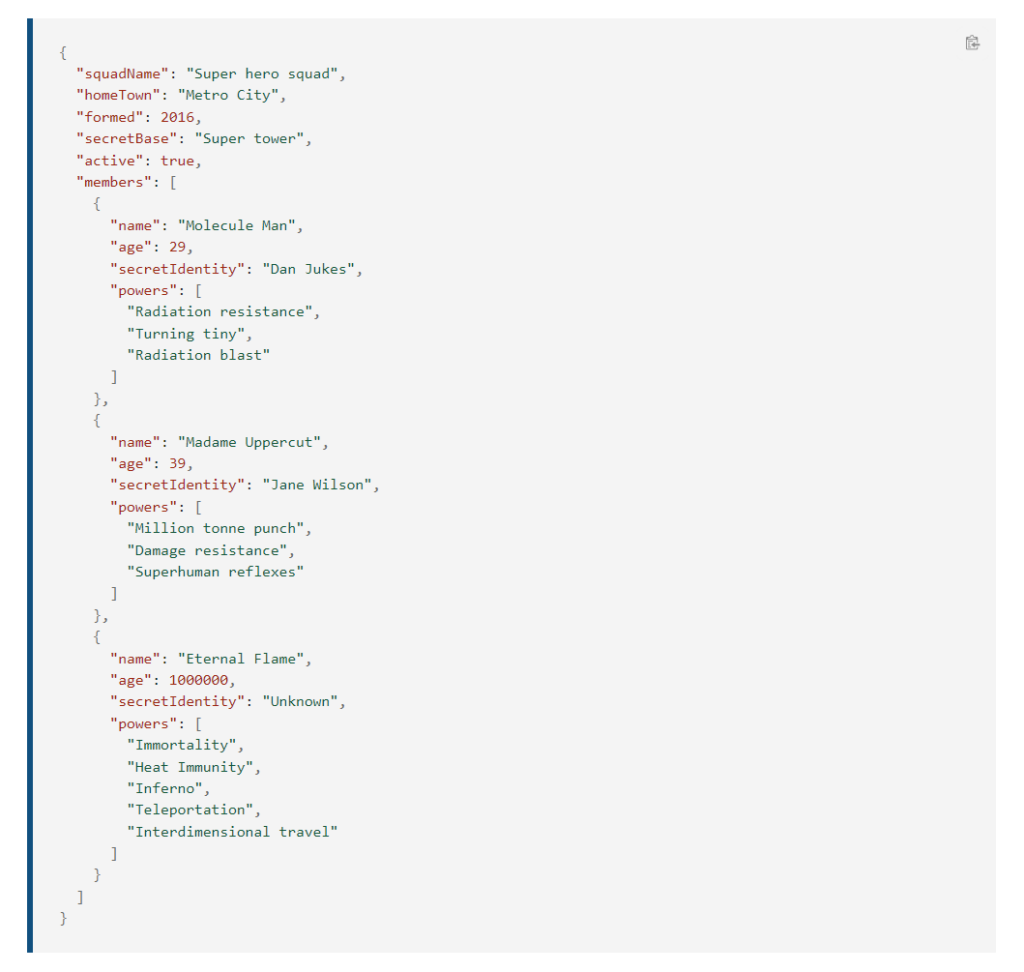
To identify the powers of Molecule Man, we can tell n8n members[0].powers. You use dot notation to move “down” a level in the JSON. Powers are a subset of a Members object. One member can have more than one Power, and there can be more than one Member. To specify a specific entry in an array, we use brackets and start at 0. members[0] returns Molecule Man, members[1] returns Madame Uppercut, and so on.
This is important for our case because Action Network Activists can have more than one email address. Let’s return to n8n and use our JSON knowledge to transform our JSON blob from Action Network into an object Google Sheets likes.
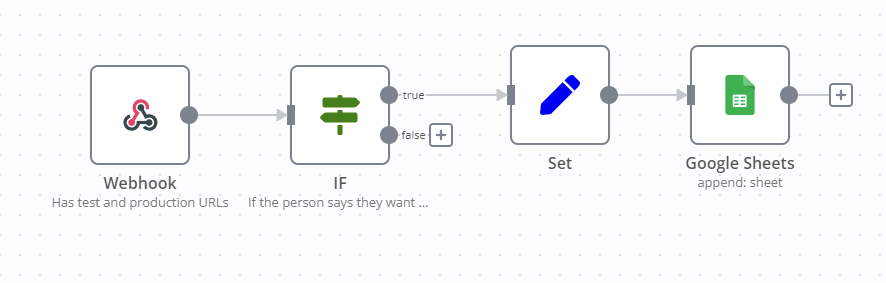
Connecting the blocks
Connect your Webhook block to your Set block, then the Set block to the Sheets block. You should see a circle indicating the start of a data flow and a rectangle indicating where it ends. When you drag a block, the flows should move with it.
Let’s see what happens. Click Execute Workflow at the bottom of the screen. The spinner should start loading, and you should see a message indicating the webhook is waiting for test data. Head back to Action Network, select your form or action that you want to trigger a webhook for, and hit save. You should now see it on the left side of the screen under Webhooks. Click test, and keep an eye on the top-right of the screen. You should see a success message.
If you didn’t see a success message
You may have seen this error (“There was an error testing your webhook):
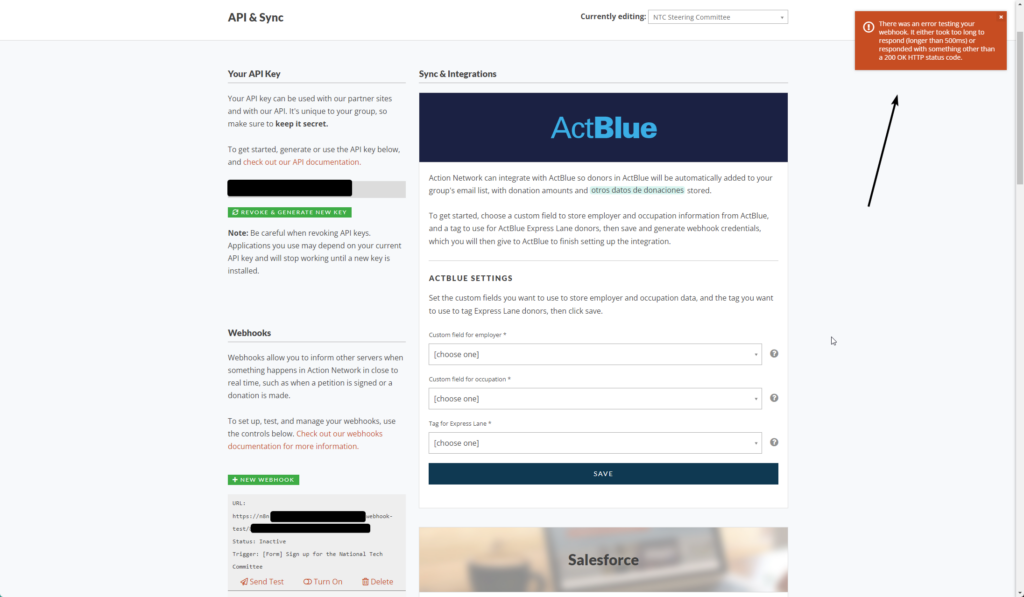
Make sure your data type is set to POST, the URL is correct, and the spinner is still animating when you hit test. n8n’s test webhook only activates for a short time after execute workflow is clicked. If execute workflow isn’t running, the webhook will not work. Action Network sends test webhooks instantly.
Data diving
Now that you had a successful webhook test, you can open the Webhook node again to look at the data. We don’t need to worry about headers for now, we want to look at the right section named Body. This shows us the data AN sent over. You can see all the data we need:
"given_name": "John", ... "email_addresses": [ { "primary": true, "address": "jsmith@mail.com" }
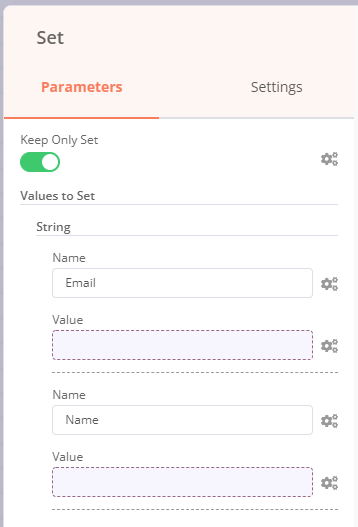
Now, let’s hop over to the Set block. Click Add Value and select String twice for our name and email strings. Click the gear icon next to the Value box next to your email string. Select create expression. Type email_address into the Variable Selector search box. You’ll see an automatically generated expression appear. If you look at the result, however, you’ll see that it doesn’t return a single email like we need.
Getting expressive
We need to edit the expression to select the part of the JSON we need. We want the first email address, so add [0] to select the first email object. Then add .address to select the address property of the first email object. You should now see jsmith@mail.com as the result!
Repeat this process of creating an expression for Name, minus the modification — you don’t need to do anything to it for it to give you the result you want. I added some extra fields, and you see a preview when you test your webhook:
If you like, you can test the webhook again (don’t forget to hit execute) to see your Set object changing the data as we told it to. Now that our data is in working order. let’s use the Sheets node to send it to our Google Sheet.
Sheets Configuration
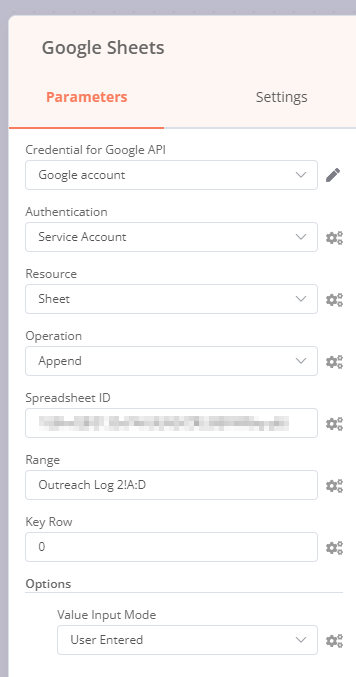
Select your Google credential, and select Service Account. Your resource is a Sheet (A spreadsheet is the entire file), and we want to append new rows to the end of the file.
Selecting a range can be a bit tricky. Google will default to the first sheet in the index (the one to the left) unless you specify a different one. The easiest way is to include the name with a ! before the range, just like in Google Sheets (unlike Sheets, you do not need to enclose the name in quotes if it has spaces).
I like to set the input mode to User Entered. This will treat the data like someone typed it in, and as such, format it and perform other changes the way you’d expect. In Raw mode, the values are inserted as-is and not changed.
Don’t forget to save your workflow, and make sure settings in sheets (like data validations and conditional formatting) are set to run on an entire column rather than a range (you can use the format D2:D to target a column minus the index row but include new columns automatically).
Finishing up
Now, go back to Action Network and ensure your webhook to your production webhook is turned ON. Enter the form with a new email (updates to existing activists are not pushed) and wait about ten minutes. You should see the webhook data arrive in the sheet!
If it doesn’t, or it doesn’t come over the way you want, there’s a few things to check. First, make sure you really waited ten minutes and put in all brand new information into the Action Network form. Then, open n8n, save your workflow, and click “Executions” on the left. You can open the state of any execution using the folder icon on the right, and retry failures with your current configuration.
If all else fails, and you are getting the webhook data from action network, make a detailed post on the n8n forums (if you don’t get a response in a few days, send it to me). You can also view my n8n project JSON and try importing it.
Leave a Reply
You must be logged in to post a comment.